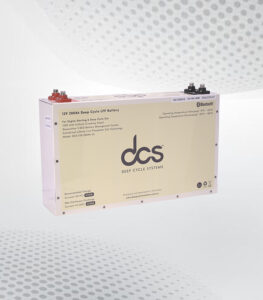
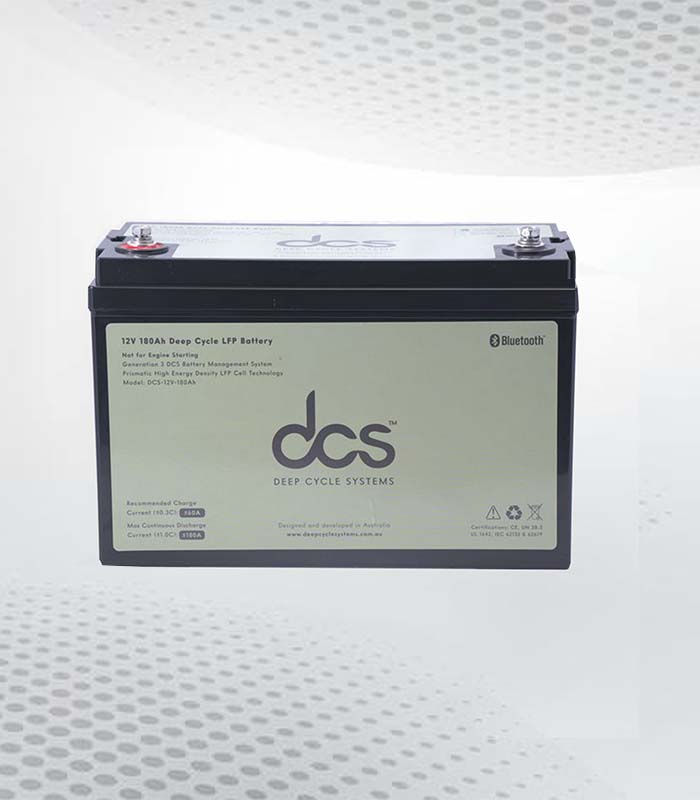
Are you ready to power up your adventures with a reliable Battery 12 Volt 180 Ah? Whether you’re setting up a new RV, boat, or renewable energy system, understanding how to safely install and use your battery is crucial. With the right tools and knowledge, you can ensure your setup runs smoothly while maximizing performance and safety. This guide will walk you through every step of the installation process, from choosing the perfect location to regular maintenance tips. Let’s dive into how you can harness all that energy without hassles!
Preparing for Installation: Tools and Safety Gear You’ll Need
Gather the essential tools and safety gear before installing your Battery 12 Volt. A few basic items will make the process smoother and safer. You’ll need a wrench set suitable for battery terminals, wire cutters or strippers, and screwdrivers. These tools help ensure proper connections and secure mounting.
Safety is paramount when working with batteries. Always wear protective gloves to shield your hands from acid exposure. Safety goggles are also important; they protect your eyes from accidental splashes or sparks during installation. A multimeter on hand can also be beneficial; it allows you to check voltage levels before connecting everything. Additionally, consider using a battery terminal cleaner to remove corrosion that could hinder performance.
Keep a fire extinguisher nearby in case of emergencies involving flammable gases released by the battery during charging or discharging cycles. Being prepared goes a long way in ensuring a safe installation experience.
Choosing the Right Location: Where to Install Your 12v 180a
Choosing the right location for your 12v 180a is crucial for optimal performance and safety. Start by assessing the space available in your vehicle or installation area. Ideally, it should be a dry, well-ventilated spot that can accommodate the battery’s weight without compromising stability.
Consider temperature fluctuations, too. Extreme heat or cold can affect battery efficiency and lifespan. Keeping your battery in a moderate environment helps maintain its performance over time. Also, think about accessibility when selecting a location. You may need to check connections or perform maintenance later on, so choose a spot that’s easy to reach without excessive effort.
Ensure there’s no risk of physical damage from other components or movements within your setup. A secure placement protects the battery and minimizes potential hazards during operation.
Installation Guide: Safely Installing Your 12-Volt Battery
Before you start the installation, ensure your workspace is clean and dry. A clutter-free area helps minimize distractions and potential accidents. Gather all necessary tools, including a wrench set, wire cutters, and safety goggles. Begin by inspecting the new battery for any visible damage or leaks. If everything looks good, position your 12-volt battery in its designated location. Ensure it’s on a stable surface to prevent tipping over during use.
Next, carefully connect the positive terminal first using an appropriate wrench. Ensure the connection is tight but not overly strained; this ensures optimum performance without risking damage to the terminal. Follow with the negative terminal similarly. Double-check that all connections are secure before powering up anything connected to your battery system. This simple step can save you from various issues and keep everything running smoothly.
Connecting Battery Terminals: Ensuring Secure and Proper Connections
Connecting battery terminals is a crucial step in installing your 12-volt battery. Start by identifying the positive and negative terminals. Usually, the positive terminal has a red cover or marking, while the negative one is often black. This distinction helps prevent potential hazards.
Use appropriate tools to connect the cables securely. Begin with the positive terminal first; this reduces the risk of short circuits during installation. Place the cable end firmly on the terminal and tighten it adequately, but avoid over-tightening as it can damage threads.
Next, move to connect your negative terminal in a similar manner. Ensure that no metal parts touch each other while you work on these connections to keep everything safe and sound. It’s essential that both connections feel secure before moving on. After securing all connections, double-check for loose wires or exposed metal that might cause shorts later. A meticulous approach makes all the difference in ensuring reliable performance from your Battery 12 Volt setup.
Avoiding Short Circuits: Common Mistakes and How to Prevent Them
Short circuits can be a nightmare when dealing with your 12 Volt 180 Ah battery. They often occur due to careless wiring or improper connections. One common mistake is mixing up positive and negative terminals, which can lead to sparks or even damage your equipment. Always double-check your connections before powering anything on. Ensure that the cables are secure and free of corrosion. Loose connections not only increase the risk of short circuits but may also reduce the efficiency of your battery.
Another mistake is placing conductive materials near exposed wires, which can create a pathway for electricity to flow where it shouldn’t. Keep tools and other metallic objects away from the installation area. Proper insulation is also key in preventing accidental contacts between different components. Use high-quality insulating tape or heat-shrink tubing around wire ends and connectors for added protection against shorts.
Polarity Matters: Correctly Identifying Positive and Negative Terminals
Understanding polarity is crucial when working with your 12 Volt 180 Ah battery. Each terminal has a specific role: positive and negative. Connecting them incorrectly can lead to serious damage or even create hazardous situations. Typically, the positive terminal is marked with a plus sign (+) and often features red colouring. Conversely, the negative terminal usually displays a minus sign (–) and is black. Familiarizing yourself with these indicators will help prevent potential mishaps during installation.
Always double-check your connections before powering up any devices linked to the battery. A common mistake occurs when users need clarification on the terminals in low-light conditions or when distracted by other tasks. Taking an extra moment for verification can save you from costly repairs. If you’re ever unsure about which terminal to connect first, remember that attaching the positive cable first is generally advisable, followed by the negative one. This practice minimizes risks while ensuring the safe operation of your battery system.
Mounting the Battery: Securing Your 12-Volt Battery in Place.
Once you’ve installed your 12-volt battery, securing it properly is crucial for safety and performance. A loose battery can lead to movement during operation, damaging the terminals or connections. This potential hazard highlights the importance of a stable mount.
Choose an appropriate mounting bracket designed for your specific battery type. Most 12-volt batteries come with pre-drilled holes or built-in handles that facilitate easy attachment. If additional support is needed, opt for extra straps or bolts that can withstand vibrations.
Always use corrosion-resistant materials when mounting your battery. Stainless steel screws and brackets are ideal choices since they prevent rust and degradation over time. It’s equally important to check the tightness of all mounts regularly. Consider placing the battery in a secure enclosure if possible. This adds another layer of protection from environmental factors while keeping everything neatly organized within your setup, ensuring optimal functionality at all times.
Charging Safely: Best Practices for Charging Your New Battery
Charging your 12 Volt 180 Ah battery safely is crucial for longevity and performance. Always use a compatible charger designed for this specific voltage and amp-hour rating. Mismatched chargers can lead to overcharging or damage, which shortens the battery’s lifespan.
Before connecting the charger, inspect the battery terminals and cables for any signs of corrosion or wear. Clean them as needed to ensure good conductivity. Secure connections help prevent overheating during charging, reducing potential hazards.
Monitor the charging process closely. Avoid leaving it unattended for extended periods. Many modern chargers come with automatic shut-off features, but it’s wise to keep an eye on things just in case. Charge in a well-ventilated area away from flammable materials. This helps dissipate gases that might accumulate during charging, ensuring a safer environment while maximizing your new battery’s efficiency and reliability.
Initial Testing: How to Check Your Battery’s Installation and Performance
Once your Battery 12 Volt is securely installed, it’s time for initial testing. Start by checking all connections to ensure they are tight. Loose terminals can lead to poor performance or even hazards. Use a wrench to tighten any connections as needed.
Next, turn on the device that the battery will power. Watch for any unusual sounds or flickering lights, which could indicate issues with the installation. If everything seems normal, you’re off to a good start.
A multimeter measures the voltage at the terminals. When not under load, a fully charged 12-volt battery should show around 12.6 volts or higher. Double-check your connections to see if readings are lower than expected, and consider charging the battery before further use.
Allow your system to run quickly and monitor its performance closely. This will help you identify any fluctuations in power delivery that point toward an underlying issue that needs attention.
Regular Maintenance Tips: Keeping Your 12 V 180 Ah in Top Condition
Regular maintenance is crucial for keeping your 12 V 180 Ah battery in prime condition. First, routinely check the terminals and connections for corrosion or buildup. Clean them with baking soda and water to ensure a solid connection. Next, monitor the fluid levels to see if your battery has removable caps. It’s essential to keep the electrolyte between the minimum and maximum lines. If it’s low, add distilled water carefully—not tap water—as impurities can affect performance.
Also, pay attention to charging cycles. Avoid letting your battery discharge completely before recharging; this practice significantly extends its lifespan. Use an appropriate charger designed specifically for your battery type.
When not in use, store your battery in a cool, dry place. Extreme temperatures can degrade performance and reduce overall efficiency over time. By following these simple tips, you’ll help maintain the optimal functionality and longevity of your 180 Ah investment.
Conclusion
Successfully installing and using your Battery 12 Volt 180 Ah can enhance the efficiency of your power system. Following safety precautions is essential to ensure a smooth setup process. With the right tools and knowledge, you can confidently tackle this task. Regular maintenance will help extend the battery’s life and performance. Routine checks for leaks, proper ventilation, and secure connections are vital to safeguarding against common issues. Being aware of the environment where you place your battery also plays an important role in its longevity.
FAQ’s
What tools do I need for installation?
For a successful install, you’ll need basic tools such as wrenches or pliers to tighten connections. A multimeter is also helpful for checking voltage levels. Remember safety gear like gloves and goggles to protect yourself while working.
How often should I maintain my Battery 12 Volt 180 Ah?
Regular maintenance is key to prolonging the life of your Battery 12 Volt 180 Ah. If applicable, check fluid levels monthly, inspect terminals for corrosion, and clean them as needed. Performing these checks every few months will keep your battery in top condition.
What should I do if there’s a spill or leak?
If you encounter battery acid spills or leaks, acting quickly but safely is crucial. Wear protective gear, neutralize the acid with baking soda if necessary, and carefully clean up with absorbent material. Always dispose of used materials according to local regulations.
| Related Business Listings |
| Directory Submissions |
| Regional Directory |