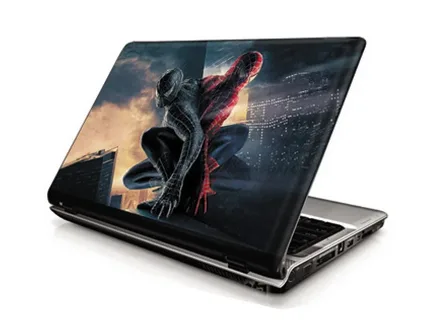
In today’s world, where personalization is key, customizing your laptop with unique designs has become increasingly popular. Many people opt for printed online laptop skins in Pakistan to add a personal touch to their tech devices. However, if you’re feeling adventurous and want to unleash your creativity, why not create your own DIY laptop skin? This guide will walk you through easy steps to design and apply your own custom laptop skins, helping you stand out with a one-of-a-kind look.
Why Create Your Own Laptop Skin?
Creating your own laptop skin has several advantages:
- Personalization: Custom designs allow you to express your individuality and interests.
- Cost-Effective: DIY solutions can be more affordable than purchasing pre-made skins.
- Creativity: Designing your own skin lets you explore your artistic side and experiment with different patterns and colors.
Materials Needed for DIY Laptop Skins
Before you start, gather the following materials:
- Adhesive Vinyl Sheets: These are the main material for your skin. Choose high-quality, durable vinyl.
- Design Software: Programs like Adobe Illustrator, Photoshop, or even free options like GIMP can be used to create your design.
- Printer: If you’re using printable vinyl, you’ll need a good printer.
- Cutting Tools: Scissors or a craft knife will help you cut out your design precisely.
- Ruler and Pencil: For measuring and sketching your design.
- Squeegee or Credit Card: To smooth out the vinyl and remove air bubbles.
- Cleaning Supplies: A microfiber cloth and rubbing alcohol to clean your laptop surface before application.
Step-by-Step Guide to Creating Your DIY Laptop Skin
1. Measure Your Laptop
Start by measuring your laptop’s surface. Use a ruler to get the exact dimensions, including any curves or edges. This will ensure that your custom skin fits perfectly.
2. Design Your Laptop Skin
Using your preferred design software, create a design that fits the dimensions you measured. Here’s how to go about it:
- Choose Your Design Elements: Think about the colors, patterns, and images you want. You can create something from scratch or use pre-made elements.
- Create a Template: Make sure your design template matches the dimensions of your laptop.
- Add Personal Touches: Incorporate personal elements, such as your favorite quotes, images, or patterns.
3. Print Your Design
If you’re using printable vinyl, follow these steps:
- Load Your Printer: Insert the printable vinyl sheets into your printer.
- Print Your Design: Use high-quality settings to ensure your design looks sharp and vibrant.
- Let It Dry: Allow the print to dry completely before moving on to the next step.
4. Cut Out Your Design
Once your design is printed and dried, cut it out carefully:
- Use a Craft Knife: For intricate designs, a craft knife will help you get precise cuts.
- Cut Slowly: Take your time to ensure accuracy.
5. Prepare Your Laptop
Before applying your DIY skin, prepare your laptop:
- Clean the Surface: Wipe down the laptop with a microfiber cloth and rubbing alcohol to remove dust and oils.
- Dry Completely: Ensure the surface is completely dry before application.
6. Apply the Vinyl Skin
Now it’s time to apply your custom skin:
- Peel Off the Backing: Gently peel the backing off the vinyl sheet.
- Align and Stick: Carefully align the skin with your laptop and stick it on, starting from one edge and working your way across.
- Smooth Out Air Bubbles: Use a squeegee or credit card to smooth out any air bubbles and ensure a smooth application.
7. Trim Excess Vinyl
After applying the skin, trim any excess vinyl:
- Use a Craft Knife: Carefully trim around the edges of your laptop for a clean finish.
- Ensure a Secure Fit: Make sure the vinyl adheres well around all edges and corners.
8. Enjoy Your Custom Laptop Skin
Congratulations! Your DIY laptop skin is now complete. Enjoy the unique look and feel of your personalized laptop. Don’t forget to share your creation with friends and family—they might be inspired to create their own custom skins too.
Tips for a Perfect DIY Laptop Skin
- Practice First: If you’re new to DIY skins, consider practicing on a smaller surface or using a test print.
- Use High-Quality Materials: Invest in good-quality vinyl and printing materials for the best results.
- Be Patient: Take your time with each step to ensure a professional-looking finish.
Conclusion
Creating your own DIY laptop skin is a fun and rewarding project that allows you to showcase your creativity and personalize your tech. While many people choose printed online laptop skins in Pakistan for convenience, making your own can be a fulfilling way to stand out and make your laptop truly yours. Follow these steps, gather your materials, and get started on your custom laptop skin today!

