The Mazda 3 is known for its performance, reliability, and engaging driving experience. One critical component that often goes overlooked is the Mazda 3 thermostat housing. This integral part helps regulate your engine’s temperature, ensuring optimal performance. Understanding its function, potential issues and maintenance tips can prolong your vehicle’s lifespan and improve efficiency. The thermostat housing not only houses the thermostat itself but also acts as a critical junction for coolant flow. Over time, it can be susceptible to wear, leaks, or cracks, leading to overheating if not addressed promptly.
Understanding the Function of a Thermostat Housing
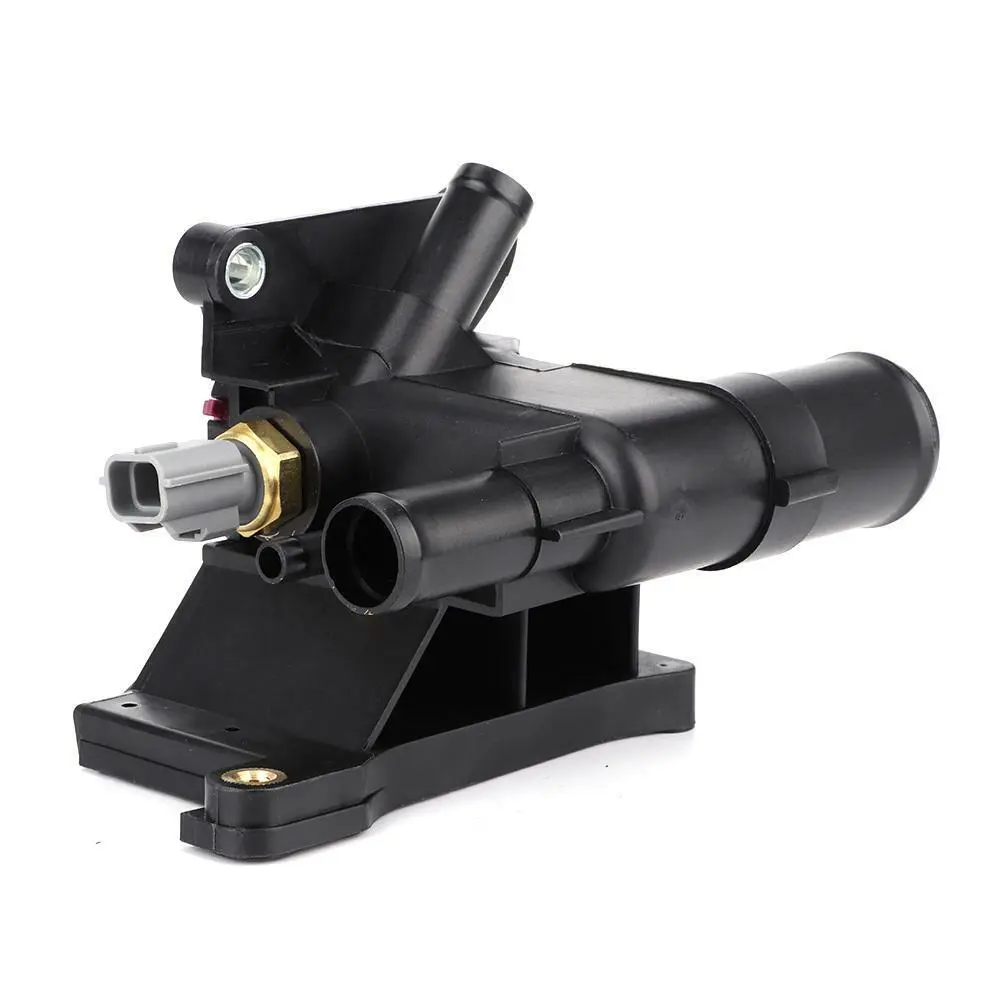
The thermostat housing in your Mazda 3 is essential to the vehicle’s cooling system. It holds the thermostat, which regulates the engine’s temperature by controlling the flow of coolant. When the engine is cold, the thermostat remains closed, allowing the engine to reach its optimal operating temperature quickly. Once the engine heats up to a specific temperature, the thermostat opens, permitting coolant to circulate and maintaining a stable engine temperature.
This regulation is crucial for preventing the engine from overheating, which can lead to severe damage or running too cool, resulting in reduced efficiency and increased emissions. The thermostat housing secures the thermostat in place and ensures that the coolant flows properly through the system. It is typically made from durable materials like aluminium or plastic to withstand harsh conditions under the hood.
In addition to its primary function, the thermostat housing can sometimes include a temperature sensor, which provides data to the engine control unit (ECU) and the dashboard temperature gauge. This helps the driver monitor the engine’s temperature and identify potential issues early on.
By understanding the role of the thermostat housing, you can appreciate its importance in maintaining your Mazda 3’s performance and reliability. Regularly inspecting and maintaining the thermostat housing can help prevent leaks and ensure the cooling system functions effectively. Addressing any signs of wear or damage promptly can save you from costly repairs and keep your vehicle running smoothly.
Common Issues with the Mazda 6 Thermostat Housing
While robust, the Mazda thermostat housing can still encounter several common issues over time. One frequent problem is leaks. The housing can develop cracks, or the gasket can wear out, leading to coolant leaks. If left unchecked, this not only lowers the coolant level but also risks overheating the engine.
Corrosion is another issue, especially in older vehicles or those without regular coolant changes. The housing’s metal components can corrode, causing them to weaken and potentially fail. Plastic housings, on the other hand, can become brittle and crack with age and heat exposure.
Another common issue is the thermostat itself getting stuck. If the thermostat fails to open or close properly, it can lead to engine temperature regulation problems. A stuck-closed thermostat will cause the engine to overheat, while a stuck-open thermostat can prevent the engine from reaching its optimal operating temperature.
Additionally, debris or build-up within the coolant system can cause blockages. This can impede the proper functioning of the thermostat and the housing, leading to cooling system inefficiencies.
Lastly, incorrect installation or poor-quality replacement parts can also cause problems. If the Mazda 6 Thermostat Housing is not installed correctly, it might not seal properly, resulting in leaks. Similarly, using subpar replacement parts can lead to premature failure.
Regular inspection and maintenance can help mitigate these issues, ensuring the longevity and efficiency of your Mazda 3’s cooling system. Additionally, high-quality coolant and regular flushing of the system can prevent build-up and corrosion. Staying attentive to early signs of thermostat housing issues, such as unusual temperature fluctuations or coolant spots under the vehicle, can help address problems before they escalate.
Troubleshooting Your Thermostat Housing
If you suspect issues with your Mazda thermostat housing, the first step is to inspect the area for any signs of leaks visually. Coolant leaks can appear as puddles under your car or as visible residue around the thermostat housing.
Another critical check involves monitoring the engine’s temperature gauge. An engine that consistently runs hotter or more relaxed than usual may indicate a malfunctioning thermostat. Also, the coolant level in the reservoir must be periodically checked. A noticeable drop in coolant levels can indicate a leak, often from a damaged thermostat housing or gasket.
Feel the upper and lower radiator hoses while the engine is running. They should feel warm, indicating proper coolant circulation. If one hose is significantly more excellent than the other, it might mean the thermostat is stuck closed, preventing coolant from circulating.
A more advanced troubleshooting step involves using a digital thermometer to measure the temperature of the coolant entering and exiting the radiator. The thermostat may not function correctly if there’s a significant temperature difference.
Additionally, pay attention to any unusual noises from the engine bay, such as hissing or gurgling sounds, which can indicate a coolant leak or air trapped in the system.
Lastly, debris or buildup within the cooling system can impede the functionality of the thermostat and housing. Inspect the coolant for any contaminants or discolouration, which might suggest a need for a coolant system flush.
By systematically checking these elements, you can pinpoint potential problems with your Mazda thermostat housing and address them before they escalate into more severe issues.
How to Replace the Mazda Thermostat Housing?
Replacing the thermostat housing in your Mazda 3 is a manageable task for those comfortable with DIY car repairs. Here’s a step-by-step guide:
Gather Your Tools:
You’ll need a socket set, wrench, new thermostat housing, gasket sealant, and coolant.
Drain the Coolant:
Begin by placing a drain pan under the radiator and draining the coolant. This prevents spills and makes the process cleaner.
Remove the Old Housing:
Disconnect the hoses connected to the thermostat housing. Then, using your socket set, remove the bolts securing the housing. Carefully take off the old thermostat housing.
Clean the Surface:
Scrape off any old gasket material from the engine’s mounting surface. A clean surface ensures a proper seal when you install the new housing.
Install the New Housing:
Position the new gasket on the thermostat housing. If recommended by the manufacturer, apply a small amount of gasket sealant. Place the new housing in position and secure it with bolts. Reattach the hoses you previously disconnected.
Refill the Coolant:
Pour the drained coolant back into the radiator or replace it with fresh coolant. Ensure the system is free of air bubbles by running the engine with the radiator cap off until the thermostat opens.
Check for Leaks:
Inspect the area around the new thermostat housing for any signs of leaks. Tighten the bolts if necessary.
Monitor Engine Temperature:
Allow the engine to reach operating temperature while keeping an eye on the temperature gauge to ensure everything functions correctly.
Tips for Maintaining Your Thermostat Housing
Regular maintenance of your Mazda thermostat housing is crucial for ensuring the longevity and efficiency of your vehicle’s cooling system. Here are some essential tips to keep it in top condition:
Perform Regular Inspections:
Periodically check the thermostat housing and surrounding area for any signs of wear, cracks, or leaks. Early detection of issues can prevent more significant problems down the road.
Change Coolant Regularly:
Fresh coolant helps prevent corrosion and buildup in the cooling system. To keep the system clean and functional, adhere to the manufacturer’s recommended coolant change intervals.
Monitor the Engine Temperature Gauge:
Keep an eye on the temperature gauge on your dashboard. Fluctuations in temperature could signal an issue with the thermostat or housing that needs addressing.
Use Quality Coolant:
Always use the coolant type recommended by Mazda. Using the wrong kind can lead to corrosion and inefficiency in the cooling system.
Inspect Hoses and Connections:
Ensure all hoses connected to the thermostat housing are secure and in good condition. Replace any that show signs of wear or damage to avoid leaks.
Keep the Engine Bay Clean:
Dirt and debris can accumulate in the engine bay, potentially affecting the thermostat housing. Regularly clean this area to prevent contaminants from causing damage.
Avoid Severe Engine Conditions:
Excessive heat or cold can stress the thermostat and housing. Drive cautiously in extreme conditions and avoid pushing your engine to its limits.
Professional Check-ups:
Ask your mechanic to inspect the thermostat housing during regular vehicle maintenance. Professional insights can help identify issues you might miss during routine checks.
Choosing the Right Thermostat Housing Replacement
The thermostat housing plays a vital role in maintaining your vehicle’s cooling system. It holds the thermostat in place and helps regulate coolant flow between the engine and the radiator. If your thermostat housing is cracked or damaged, replacing it promptly is essential to avoid overheating issues. Here’s how to choose the suitable thermostat housing replacement.
1. Know Your Vehicle’s Specifications
Before purchasing a thermostat housing, ensure you know your vehicle’s make, model, and year. Thermostat housings vary depending on the engine configuration, and getting the right match is crucial for compatibility. Check your vehicle’s manual or consult a mechanic to verify the proper part.
2. Consider Material and Durability
Thermostat housings are typically made from plastic, aluminium, or cast iron. Plastic housings are affordable but less durable, while aluminium and cast iron options are more resilient and long-lasting. Opt for materials that can withstand high engine temperatures and pressure, especially if you drive in extreme conditions.
3. Opt for OEM or High-Quality Aftermarket Parts
Choosing Original Equipment Manufacturer (OEM) parts is always a good idea, as these are specifically designed for your vehicle. However, high-quality aftermarket parts can also offer reliable performance at a lower price. Ensure any aftermarket part meets or exceeds OEM standards for quality.
Selecting the proper thermostat housing can help maintain your engine’s optimal temperature and prevent costly repairs.
Conclusion
Maintaining your Mazda 3 thermostat housing is crucial for optimal vehicle performance and longevity. This small yet significant component ensures your engine operates within the ideal temperature range, preventing overheating or running too cool. Regular inspections and maintenance can preempt common issues, such as leaks, corrosion, or a malfunctioning thermostat. Should you encounter any problems, troubleshooting steps like checking for coolant leaks, monitoring the engine temperature gauge, and feeling the radiator hoses can help diagnose the issue. If replacement becomes necessary, choosing a high-quality thermostat housing that fits your specific model is vital for seamless installation and reliable function.
FAQS
Q: How do I know if my Mazda thermostat housing needs replacement?
A: Signs include coolant leaks, engine overheating, unusual temperature gauge readings, or visible cracks on the housing. Regular inspections can help detect these issues early.
Q: Can I drive my Mazda 3 with a faulty thermostat housing?
A: Driving with a faulty thermostat housing is not recommended as it can lead to engine overheating or inefficient cooling, potentially causing severe engine damage.
Q: How often should the thermostat housing be inspected?
A: It’s advisable to inspect the thermostat housing during routine maintenance checks or whenever you notice signs of coolant leaks or temperature irregularities.
Q: Is it difficult for me to replace the Mazda 3 thermostat housing?
A: Replacing the Mazda 3 thermostat housing is manageable for those comfortable with DIY car repairs. However, it requires essential tools and knowledge of the vehicle’s cooling system.
Q: Should I use OEM or aftermarket thermostat housings?
A: OEM parts are preferred for their compatibility and durability, though high-quality aftermarket options can be considered if they meet the necessary specifications.
Q: What material is best for a thermostat housing replacement?
A: Both aluminium and high-quality plastic are viable options. Aluminium is more durable, while plastic can be cost-effective without compromising performance.