
The 2008 Ford Ranger exterior door handle replacement may seem daunting, but with the right guidance and tools, it can be accomplished successfully. Whether the door handle has become worn out or broken, knowing how to replace it can save both time and money. This guide provides essential tips and detailed instructions for replacing the exterior door handle of a 2008 Ford Ranger.
Tools and Materials Needed
The replacement process for the exterior door handle necessitates several tools and materials. Essential items include a set of screwdrivers, a panel removal tool, a socket wrench set, and needle-nose pliers.
A replacement door handle specifically designed for the 2008 Ford Ranger is also required. Ensure all tools are in good working condition to facilitate an efficient and trouble-free procedure.
Understanding the Door Handle Mechanism
The exterior door handle mechanism in a 2008 Ford Ranger involves a system of rods and clips that connect the handle to the door latch assembly. When the handle is lifted, these rods engage the latch, opening the door.
Recognizing how these components function together helps accurately disassemble and reassemble the handle during replacement. The handle’s interaction with the internal locking mechanism also plays a crucial role, and understanding this relationship is critical to ensuring a successful installation.
Preparing the Vehicle
Preparing your 2008 Ford Ranger properly is essential to ensuring a smooth and safe door handle replacement process. Begin by positioning the vehicle on a stable, level surface to prevent accidental movement during the repair. Engage the handbrake to secure the vehicle and avoid any unintentional rolling.
Safety should always be a top priority. Disconnect the negative battery terminal before proceeding with the replacement to prevent electrical mishaps. This will ensure the vehicle’s electrical system is de-energized, reducing the risk of accidental shocks or shorts.
Gather all the necessary tools and materials beforehand to avoid unnecessary interruptions during the repair process. Lay them out organised for easy access and to streamline the workflow. This preparation will help you stay focused and efficient, ensuring a successful door handle replacement.
These preliminary steps set the stage for a smooth and safe door handle replacement on your 2008 Ford Ranger. A well-prepared workspace and a focus on safety will contribute to a successful outcome and minimize the risk of complications.
Removing the Interior Door Panel
To access the door handle assembly:
- Begin by locating and removing all visible screws securing the interior door panel.
- Carefully use a panel removal tool to pry the panel away from the door, not damaging the clips and fasteners.
- Before completely lifting the panel off, disconnect any electrical connections, such as those for power windows or locks.
- Keep all removed screws and parts in a safe place for reassembly.
This meticulous approach ensures the panel is removed without causing damage, facilitating the subsequent steps in the handle replacement process.
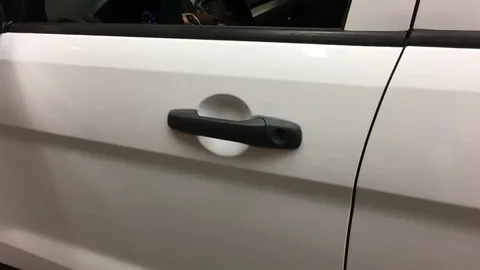
Accessing the Ford Ranger Exterior Door Handle Assembly
You can easily access the Ford Ranger Exterior Door Handle assembly with the interior door panel removed. This step is crucial for any repairs or replacements you plan to undertake.
Identifying the Rods and Clips
Locate the rods and clips connecting the door handle to the latch mechanism. These components are integral to the handle’s operation, so understanding their configuration is vital for successful reassembly.
Observing Configuration and Position
Carefully observe how the rods and clips are positioned. Note their arrangement. This knowledge will guide you in reattaching the new handle correctly. A slight mistake can lead to improper functionality.
Detaching Obstructing Components
Next, detach any components obstructing the handle assembly. This may include screws, covers, or additional rods. Keep track of each part you remove to ensure a smooth reinstallation process later on.
Importance of Attention to Detail
Maintaining precise attention to detail during this process is essential. Each component plays a role in the overall mechanism, and ensuring that everything is accounted for will help the new handle function smoothly.
Reinstallation of the New Handle
Once the old handle is detached and everything is organized, you can proceed to install the new handle. Refer to your observations to align the rods and clips correctly, ensuring the door operates seamlessly after reassembly.
Detaching the Old Door Handle
Removing the old door handle requires a delicate approach to avoid damaging any surrounding components. Begin by carefully identifying and removing the screws or fasteners that secure the handle to the door panel. Depending on the vehicle model, these fasteners may be located inside or outside the door.
Once the fasteners are removed, gently maneuver the handle to detach it from the connecting rods or clips. Please pay close attention to the arrangement of these components, as they will need to be reconnected in the same order when installing the new handle. Take your time and avoid using excessive force to prevent damaging the handle or the door panel.
Handling: Handling each part with care is essential to minimize the risk of damage. If you encounter any resistance or difficulty, consult your vehicle’s service manual or seek assistance from a qualified mechanic. By following these guidelines, you can safely and effectively detach the old door handle, paving the way for a smooth installation of the new one.
Inspecting and Preparing the New Handle
Before proceeding with the installation, carefully examine the new door handle for any manufacturing defects or signs of damage. Ensure it conforms to the specifications of the original component. Clean all surfaces that will contact the door assembly to facilitate a secure fit. This attention to detail helps prevent potential issues and ensures the handle performs as expected once installed.
Installing the New Door Handle
When replacing a door handle, starting with the proper positioning is essential. Take your time to ensure that the handle is aligned correctly with the door’s design and functionality.
Reattaching Connecting Rods and Clips
Reattach the connecting rods and clips once the new handle is in place. Ensure these components are fitted in their original configuration to maintain the door’s operation. This step is crucial as it effectively connects the handle to the latch mechanism.
Securing the Handle
With the handle positioned and the connecting components in place, secure the handle using screws or fasteners. It’s essential to choose the right type of screws for your specific handle. Tighten each screw appropriately, being careful not to overtighten, which could damage the door or the handle.
Ensuring Proper Alignment
After securing the handle, confirm that it aligns properly with the door latch mechanism. Misalignment can lead to functional issues, making it difficult to open or close the door smoothly.
Checking for Smooth Operation
Next, test the handle to ensure it operates smoothly. Turn or pull the handle and observe how it interacts with the latch. A well-installed handle should provide a seamless experience, enhancing the door’s overall usability.
Final Inspection
Finally, perform a thorough inspection. Check all screws and connections one last time to confirm everything is secure and functioning as intended. This step ensures the longevity of your new door handle and the safety of your home.
Reassembling the Ford Ranger Exterior Door Handle Replacement Components
You can replace the entire door panel once you have the Ford Ranger Exterior Door Handle Replacement and any other necessary components. Carefully reverse the steps you took to remove the panel, ensuring that all clips, screws, and fasteners are securely tightened in their original positions.
Please pay close attention to the alignment of the door panel, ensuring it fits snugly against the door frame and aligns correctly with the surrounding trim pieces. A misaligned panel can affect the door’s functionality and appearance.
Reconnect any disconnected electrical components during the removal process, such as power windows, door locks, or ambient lighting. Ensure that all connectors are properly seated and secure to prevent electrical issues.
After reassembling the door panel:
- Test its functionality.
- Open and close the door several times to ensure it operates smoothly and latches securely.
- Check for any binding or resistance, and make any necessary adjustments.
By following these steps and paying attention to detail, you can successfully replace the interior door panel and restore your vehicle’s door’s functionality and appearance.
Testing the New Handle
After installing the new door handle, it is vital to assess its functionality to ensure a successful replacement. Operate the handle multiple times to verify that it opens and closes smoothly without resistance. Evaluate the exterior and interior handle functions to confirm they correctly engage the door latch.
Additionally, check the locking mechanism to ensure it works with the new handle. Performing these checks promptly helps identify misalignments or loose connections that might need adjustment. This comprehensive testing process ensures that the handle operates as intended, providing reliability and security for the vehicle.
Common Issues and Troubleshooting
Common problems during the exterior door handle replacement include misaligned rods and loose clips, which can hinder proper operation. To troubleshoot, carefully inspect all connections and ensure each component is securely fastened.
Reviewing and repeating the installation steps may reveal any overlooked issues if the handle functions differently than expected. Verifying the rods’ alignment and the clips’ position often resolves these common issues, ensuring the handle operates smoothly and reliably.
Maintenance Tips for Longevity
Ensuring the longevity of the new door handle involves regular maintenance. Clean the handle and surrounding areas to remove dirt and debris that may cause wear. Periodically lubricate the moving parts with an appropriate lubricant to keep them functioning smoothly.
Inspect the handle and its connections for any signs of loosening or damage, addressing minor issues promptly to prevent them from escalating. Proper maintenance not only enhances the handle’s performance but also extends its lifespan, contributing to the overall reliability of the vehicle’s door mechanism.
Conclusion
Replacing the Ford Ranger Exterior Door Handle is a relatively straightforward task that can be completed with the right tools and knowledge. By following the steps outlined in this guide, you can successfully replace the door handle and restore proper functionality to your vehicle. Remember to consult your vehicle’s service manual for specific instructions and to use high-quality replacement parts to ensure long-lasting performance.
FAQs
1. What tools do I need to replace the exterior door handle on my 2008 Ford Ranger?
To replace the exterior door handle on your 2008 Ford Ranger, you will need a few essential tools, including a flat-head screwdriver, a Phillips-head screwdriver, and possibly a socket wrench. You may also need a trim removal tool to pry off any plastic panels that cover the handle.
2. Can I replace the exterior door handle myself?
You can typically replace the exterior door handle on your 2008 Ford Ranger yourself. However, if you are uncomfortable with automotive repairs or the process seems complex, it is best to have it done by a professional mechanic.
3. How much does replacing the Ford Ranger Exterior Door Handle cost?
The cost of replacing the Ford Ranger Exterior Door Handle will vary depending on the specific model and trim level and labour costs in your area. You can expect to pay anywhere from $50 to $100 for the replacement part, plus additional labour costs if you have it installed by a mechanic.
| Related Business Listings |
| Contact Directory |
| Local Business Profiles |