
The window motor replacement process may seem daunting at first, but with the right guidance and tools, it becomes straightforward. This comprehensive tutorial will guide the reader through each step necessary to successfully replace the mazda 6 window motor replacement, ensuring the job is done efficiently and safely.
Understanding the Window Motor
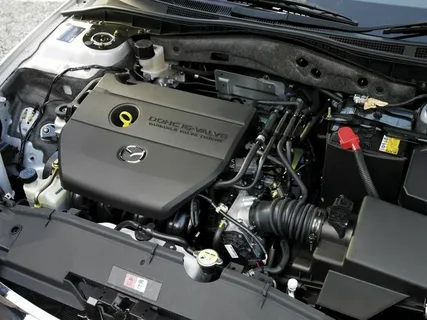
The window motor in a Mazda 6 is an essential component responsible for the movement of the window glass. It operates in tandem with the window regulator, facilitating the smooth raising and lowering of the window. When the window switch is activated, the motor receives an electrical signal that triggers its mechanism to move the window up or down.
Faulty window motors can result in windows not opening or closing correctly, leading to inconvenience and potential security risks. Common symptoms of a failing window motor include sluggish movement, unusual noises during operation, or complete inactivity.
Recognising these signs early on can assist in timely replacement, preventing further complications. Understanding the role and function of the window motor aids in diagnosing issues and ensures the correct procedures are followed during its replacement.
Essential Tools and Equipment
Before starting the window motor replacement, gathering all necessary tools and equipment is crucial to ensure a smooth process. Essential items include various screwdrivers, such as Phillips and flathead, for removing screws and other components. A socket set is needed for loosening and tightening bolts, while a trim removal tool aids in safely detaching the door panel without causing damage.
Electrical tape helps secure loose wires, and a new window motor is required for the replacement. Safety gloves should be worn to protect hands from sharp edges, and a Torx screwdriver set may be necessary for specific screws. Ensuring these tools are readily available will facilitate a more efficient and organised workflow during the replacement procedure.
Safety Precautions and Preparations
To prevent any risk of electrical shocks, it is imperative to disconnect the vehicle’s battery before beginning the replacement process.
Protective Gear
Safety gloves should be worn to protect hands from potential cuts or injuries caused by sharp edges during the disassembly.
Adequate Lighting
Ensure the workspace is well-lit to avoid accidental mishaps and ensure all components are visible.
Secure the Vehicle
The vehicle should be parked on a flat, stable surface with the parking brake engaged to prevent any movement during the repair.
Read the Manual
Consulting the vehicle’s manual for specific Mazda 6 instructions will provide guidance tailored to the particular model and year.
Organise Tools
Keeping all necessary tools within arm’s reach will streamline the workflow and reduce the time spent searching for items during the replacement procedure.
Removing the Door Panel
To access the window motor, the door panel must first be removed. Begin by locating and eliminating any screws situated in the armrest and around the door handle. Utilise a trim removal tool to gently pry the door panel away from the clips, securing it in place. Carefully lift the panel away, cautioning not to damage any wiring connected to the controls.
Once the panel is loose, disconnect any attached electrical connectors, ensuring they are safely set aside to avoid interference. If there are any additional fasteners or clips, these should be removed with appropriate tools. Keep track of all screws and clips for reassembly.
Accessing the Mazda 6 Window Motor
With the door panel removed, the next step involves locating the Mazda 6 Window Motor, typically mounted on the window regulator inside the door cavity. Start by identifying any protective coverings or barriers that may be present and gently remove them. This often involves detaching additional screws or clips that secure these coverings in place.
Once the protective barriers are removed, the window motor should be visible and accessible for replacement. Take care to keep any removed screws or clips organised, as they will be needed during reassembly. Ensuring clear access to the window motor will facilitate a smoother and more efficient replacement.
Disconnecting the Window Motor
Before the window motor can be removed, it is crucial to disconnect the electrical connector attached to it. This connector is typically held in place by a small tab that must be pressed to release the connection. Gently pull the connector apart, ensuring it does not damage any wires in the process.
Secure the disconnected wiring away from the immediate workspace to prevent accidental damage during the replacement procedure. This step is essential to ensure safety and avoid electrical interference while replacing the motor. Proper electrical connector and wiring handling is crucial for a successful and smooth replacement process.
Removing the Window Regulator
Removing the window regulator and the motor may be necessary in some instances. Begin by unscrewing and detaching the regulator from the door frame, ensuring that each screw and clip is carefully removed and set aside for reassembly. Supporting the window glass during this step is crucial to prevent it from falling or shifting. Gently lift the glass and secure it in place using a piece of tape or a wedge to hold it steady. Once the regulator is accessible from the door frame, gently manoeuvre it out of the cavity.
Pay attention to the position and orientation of the regulator to aid in reinstallation. If the regulator is damaged or excessively worn, consider replacing it alongside the window motor to ensure optimal performance. Keeping the workspace organised and noting the arrangement of components will streamline the reassembly process. Proper handling of the regulator and window glass is essential to avoid damage during removal.
Installing the New Window Motor
Begin by carefully aligning the new window motor with the mounting holes on the window regulator. Ensuring proper Alignment at this stage is crucial for a smooth installation process.
Secure the Motor
Once aligned, use the appropriate screws to fasten the new motor in place securely. Make sure the screws are tightened sufficiently to prevent any loosening during operation.
Attach the Regulator
Reconnect the window regulator to the door frame. Ensure the regulator fits snugly and is adequately secured with all necessary screws and clips that were previously removed.
Connect the Wiring
Reattach the electrical connector to the new motor, confirming a secure and stable connection. Check that no wires are pinched or exposed.
Check Alignment
Verify that the window glass aligns correctly with the regulator. This step is vital to ensure that the window moves smoothly within its track without obstruction.
Test Movement
Before finalising the installation, manually test the window’s movement to detect any resistance or misalignment. This preliminary check helps identify and rectify issues before complete reassembly.
Reconnecting Electrical Components For Mazda 6 Window Regulator
Reconnect any electrical components or controls that were detached during the removal process. Start by identifying the electrical connectors that need to be reattached. Ensure that each connector is securely fitted into its corresponding socket, paying close attention to the Alignment of pins and terminals. This is essential to avoid any loose connections or potential electrical faults.
Once the connectors are correctly seated, double-check that no wires are pinched or exposed, as this could lead to future malfunctions of Mazda 6 Window Regulator. Use electrical tape if necessary to secure any loose wiring and prevent it from interfering with moving parts.
Follow the manufacturer’s guidelines to ensure correct reattachment for any components with multiple connections. This may include matching coloured wires or following numbered sequences for more complex systems. Ensuring each connection is made correctly will facilitate the smooth operation of the window motor and related controls.Finally, inspect the entire assembly for any signs of wear or damage that may have occurred during the disassembly and reinstallation process, making any necessary adjustments before testing the motor.
Testing the New Window Motor
Reconnect the vehicle’s battery and use the window controls to operate the window. Observe the window’s movement, ensuring it glides smoothly without irregular noises or resistance. Please pay close attention to the window’s Alignment and check that it opens and closes fully. If any issues are detected, such as slow movement or misalignment, investigate and address these problems before proceeding with the reassembly.
Ensure the motor responds promptly to the switch and that the window regulator functions as expected. This step is crucial to verify the new motor’s successful installation and identify any potential adjustments needed before reattaching the door panel.
Reinstalling the Door Panel
To reinstall the door panel, align it with the door frame, ensuring all clips and fasteners match their original positions. Start by gently pressing the panel back into place, listening for the distinctive click that indicates the clips have securely engaged. Next, reinsert any screws that were previously removed, using the appropriate screwdriver to ensure they are tightened without overtightening, which could damage the panel.
Reconnect any electrical connectors that were detached earlier, double-checking their secure fit and Alignment. If the door panel includes additional components such as door handles, switches, or speakers, ensure these are adequately reattached. Carefully feed any necessary wiring through the appropriate openings before securing these components.
Once the panel is securely positioned and all connectors are appropriately reattached, give the door a gentle shake to confirm that everything is firmly fixed and there are no loose parts. Verify that the door handle and window switch operate smoothly and without obstruction. Finally, clean any fingerprints or smudges off the panel to restore its appearance to pristine condition.
Conclusion
Replacing the Mazda 6 Window Motor, though seemingly complex, is a task that can be approached with confidence when equipped with the proper knowledge and tools. A systematic approach ensures that each step, from removing the door panel to reinstalling it, is executed with precision and care. Properly disconnecting the battery, wearing safety gear, and working in a well-lit environment are fundamental precautions contributing to a safe and efficient replacement process.
The importance of using the correct tools must be considered. Items such as screwdrivers, a socket set, and a trim removal tool are critical in facilitating smooth disassembly and reassembly. Organising these tools before beginning the task enhances workflow and reduces potential frustration.
Ensuring that the new motor is correctly aligned and securely attached to the window regulator is crucial for the window’s smooth operation. Additionally, reconnecting all electrical components correctly and checking for any signs of wear or damage guarantees the window mechanism’s long-term functionality. Testing the new motor before fully reassembling the door panel helps identify any issues early, making necessary adjustments easier.
In conclusion, thorough preparation and adherence to detailed steps enable vehicle owners to confidently tackle the replacement, ensuring the Mazda 6’s window operates seamlessly.
FAQs
What causes a window motor to fail?
A window motor may fail for various reasons, such as wear and tear over time, electrical issues, or damage caused by moisture or debris entering the motor. A faulty window switch or wiring problems can also contribute to the motor’s failure.
Can the Mazda 6 Window Motor be replaced without professional help?
Yes, an individual with basic mechanical skills can replace the Mazda 6 Window Motor. Having the right tools and following a detailed tutorial, such as the one provided, can assist in carrying out the replacement efficiently. It is crucial to adhere to safety precautions and carefully follow each step of the process.
How long does it typically take to replace a window motor?
The replacement process can vary, typically taking 1 to 3 hours. This time frame depends on the individual’s experience and familiarity with the vehicle’s components. Preparing all necessary tools and clearly understanding the steps involved can streamline the process and reduce the time required.